Sunday 30 December 2012

December jobs

Having a few days off over Christmas is getting a few essential tree jobs done. Earlier in the year I submit a picture for consideration in the Noelanders show and it was accepted so the guy wires were removed 2 weeks ago to see if the branches would hold in place (I didn't want to have them removed on show day and the branches pop up ! I think if this happens it is better to leave them in place).

The two guyed branches had been hollowed underneath completely out of sight 4 months ago, and the combination of wire holding and branch healing has set them perfectly. If just a wire had been used the tree would keep springing back for a year or more.

As the branches were holding properly the upward new growth tips were wired flat and the algae washed from the bark. I few smaller branches were moved a little to balance the gaps and foliage pads but on the whole the tree has been kept as natural as possible. I felt the lower branch on the right was a little too long in the submision picture so I shortened it a few inches. I'm pleased with how the tree responded last year - lots of my bonsai food, the root reduction and repotting, the rain......the tree seemed to thrive through it all and has come on so far over the 4 years I've been styling it.

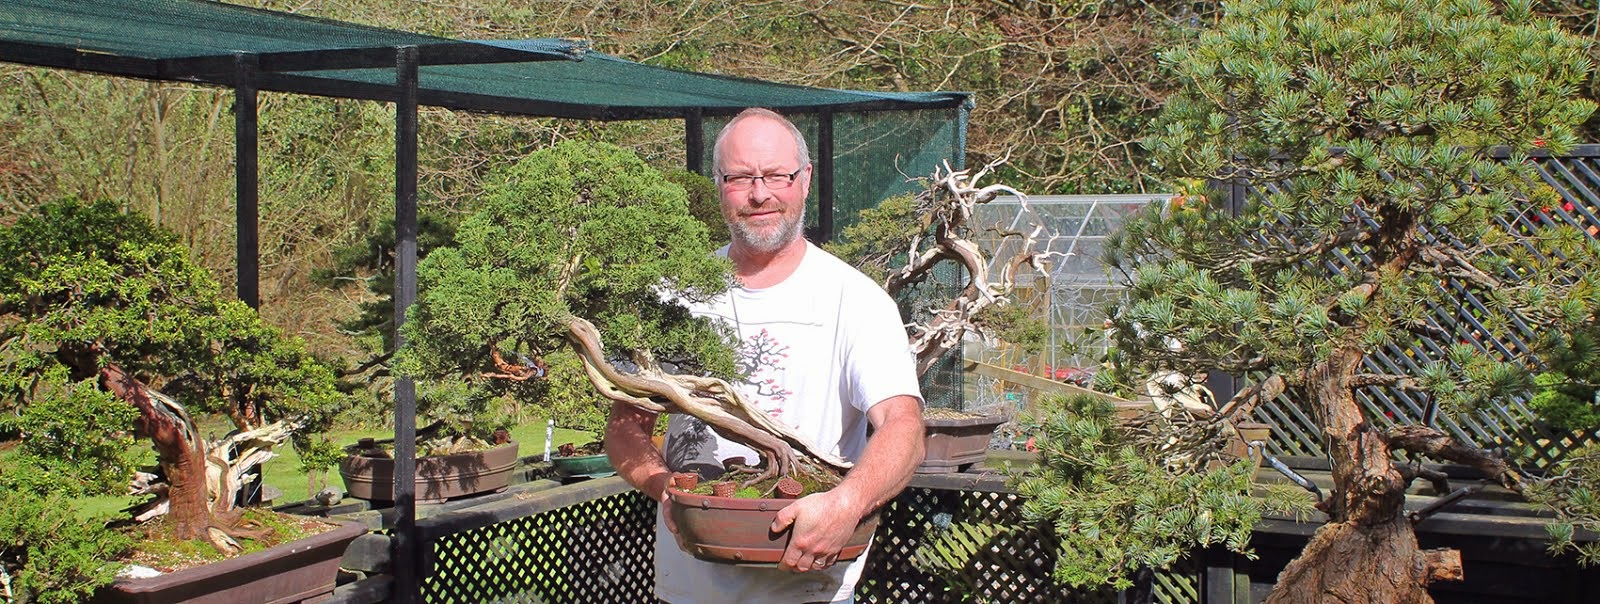
The pot is Tokoname, made at the Seizan kiln by Mr.KATAOKA Katsushi. This is a fairly old pot that was imported directly to the UK by Anne Swinton some years ago. It was home to her Ginko for many years and is the actual pot pictured with the Ginko in her book. Over time that tree was sold but died, another tree (juniper) ended up in the pot and I bought it, so got the pot. Funnily enough I didn't know about the pots history until a few years later but soon wanted the pot for a better tree, so out came the juniper !. The hinoki has been repotted 3 times in 4 years, smaller each time, and every timee the pot has been a mass of new roots. I may let the tree go 2yrs to restrict the roots a bit and slow the vigour - this will tighten the foliage up in future years

 Finding a nice stand here isn't that easy, especially for larger trees so I bought one from Japan and had it shipped over. The service from J Bonsai (bonsai network japan) https://jbons252.securesites.com/ssl_index.html was superb and the stand was in the UK in 3 days. Then it takes the UK delivery service over a week due to xmas getting in the way but the main think is it is here, in perfect condition and in time for the show.


The roof at the side of our house has a fair bit of lovely silver moss on it so new years day I will get the roof ladder out and collect some to moss the pot. Then i will liquidise some fresh sphagnum moss and mix it with water, spread a thin layer on the soil and add the surface moss on top. This is a little more work but keeps the top dressed moss looking so much better as there are several days involved with the Noelanders show. Equally importantly the Hinoki does not like drying out so the sphagnum layer keeps up humidity while the tree is traveling and in the show.

Two other xmas projects are on the go too, so more posts to follow very soon.

Saturday 1 December 2012

The Year of the Juniper

 
2013 will be my year of the juniper - - lots of styling practice in the first few months just in case the EBA final tree happens to be a juniper !! plus there is some great material to work with both here already and on the near horizon.

The first tree is great - the sort of material that you dont just stumble over every day. (pic S. Tolley)


This is a yamadori tree grafted with Itiogawa foliage in Japan. The tree came back into Europe with Mario Komsta after one of his japanese visits. It found its way to Steve Tolley via Noelanders sales area, then to me ! The attraction to the material ? - the trunk is a beautiful wind sculpted flute, the foliage is good variety, the pot is very good and most importantly it is an unstyled piece of japanese raw material.

First thing was to wash and brush down the trunk, then I decided to clean it up with the sand blaster


The blasting cleaned the old build up of Lime sulphur from the grooves in the wood, adding more texture to the tree. I decided to make my own mark on the styling and carve the trunk a bit to add some depth and depressions to the large mostly flat area. Working slowly with small tungsten carbide dremel bits I hollowed right through the trunk and extended a few grooves along the trunk, working with the natural ripples and grain.


After a rough carve, the next job was removing signs of the work, so a circular wire brush was fitted to the dremel and the edges softened, The final texture was added with a scalpel and a razor blade working some fine cracks into the natural grooves in the wood. I painted the deadwood with water, then straight away with Lime Sulphur, now it will be left to dry out so the wood shrinks and the cracks open up a bit more.

The pot.
I knew it was a really nice pot when looking at the tree, but wasn't until I put the tree in the car I saw the nail signature in the bottom. I drew a blank trying to look up the details so asked for help on the forum and  the initial response from Ryan was exciting to say the least.

The pot is from the Gyozan kiln - and initial thoughts were Nakano Yuuji


The next day there was an update from japan
 
nekotoban on Wed Nov 28, 2012 1:38 pm

"I THINK this pot made by Nakano Yukizo Gyozan himself, not his son Yuji.
 
The kugibori(nail signature) can be read as follows.
Right: His Imperial Majesty
Middle: Commemoration for the Emperor's accession for the imperial throne
Left: Nakano Gyozan made

I believe this pot was made when the Emperor Akihito had acceded to the throne."
 
This makes this a special commemorative pot made in 1990 by the Gyozan Kiln. I was told "This kiln is renowned for producing some of the very finest unglazed pots in Japan, along with Suzuki Syuzan and perhaps Kamiya Ryuen they are reputed for making the finest unglazed pots in Japan"
 
 
I need to be carefull with it, as non commemorative pots this size apparently cost 150-200 k¥. (This must be my lucky tree as the pot value had been overlooked as the tree moved across Europe - but tree and pot will stay together, that is only right) The tree will deserve the best styling possible - and I'm planning another bespoke root stand. Here it is on the big stand I made for the big slanting juniper
 
 
Ready to wire - It will go in the car nice and easily so I'll take the tree to the Ryan Neil workshop early next year.
 
********************************************************
 
Juniper project 2
This will be the large juniper communis - it really fills the car so I dont think Mandy will want it poking her in the ear on the trip up North so I'm going to work this tree slowly over the next couple of years rather than take it to the workshop. I have been deliberating and the communis doesnt want any wire on secondary branches or it will suffer massive die back, while the workshop environment is about wiring and styling. I have decided the tree is too precious to risk so am keeping it at home - I want to change the planting angle so plan to repot in spring - then let it recover and carry on acclimatising to Cornwall for all next year. I'll place a couple of the key branches with guy wires  and feed / prune to trigger lots more budding.
 
It reminds me of my Juniper Rigida - I waited 4 years to 1st style it and the tree is responding so well to the slow pace of work.
 
*****************************************************************
The mouthwatering temptations
 
These are the type of material trees I'm currently drooling over and hoping to be lucky enough to aquire one in the forthcoming 'year of the juniper'


Sunday 14 October 2012

My Day - Sunday 14th Oct

My day was centered on the FOBBS Bonsai talent contest final - held at Capel Manor bonsai show.

This post is picture based and are a few from the day. The contest was 3 hours  long and the winner is going on to represent the UK in the European final
 
The tree.........I'm happy !


looking..............
Looking closer..........................
 
Mickey looking too................
I'm still looking.........the tree is in there, I'm not rushing until i find it............
we have lift off.............................


Three hours flew by, but a few little tweaks and we came in on time.


And I managed to win..............Here is the tree as it was styled in the 3 hours
 
 
 Thanks to all involved (I kept plenty of green bits :-) )
 
 
Slipped into an Erin Pot, little bit of moss and 10 minutes more tweaking


Thursday 11 October 2012

What's under your nose sometimes

I'm lucky I guess to have a nice bonsai nursery just 4 miles away - my first tree came from there after a random visit 21 years ago, so the place has a lot to answer for ! I try to pop in regularly as it is on the door step (as you do) so tend to think that I know most, if not all the stock by heart. The beauty of having a good few hundred trees dotted about though is it is easy to miss one - this happened 5 years ago with my Hinoki - it had been there 10+ years yet I had always missed really seeing it. One day Mandy I walked through the nursery back door, saw the tree and both knew it had so much potential. It was unrefined, never really wired, so perfect as we could take our time and make it into our own bonsai. The 'just bought' pictures were lost on a laptop that died but it was upward, straggly and in a huge 29" x 22" x 5"oval pot . The first 2 years were spent feeding, pruning, repotting etc then wiring every bit. My first picture was 2 years ago when it was wired down - looking back it was very much stage one, a bit pointy and looking young

 
To get away from a young tree image I decided to shorten and round the crown and hollow the trunk - creating a shari and some jin - the majority of the forum decided I'd ruined the tree  (ibc - I was a new face on there - but Ed  and just a couple of others saw the potential and were very encouraging). To be fair a newly carved tree looks raw and rough but it made me determined to refine the work and produce the tree I'd imagined.
 
Now the tree is heading in the right direction and is virtually free of wire. The pot is an old Tokoname Kataoka rectangle originally imported by Anne Swinton many years ago.

Imagine my surprise and excitement this week when pulling into the car park I spy 12-15 large trees sat in a row - pines, maples, elms, beeches, hornbeams...............one of those great occassions when a guy gets a little older and lets the larger trees go so they can concentrate on their smaller ones. (a great occassion for the rest of us anyway !)


The first is a seed grown Pinus Pentaphylla...........origin Japan, imported by Steve Tolley a few years ago 
 
The Pentaphylla is a lovely white pine variety with softer yellow green needles,  but they are notorious for being weaker than grafted white pines. I've had one over 15 years and the soil needs to be extra free draining, the roots need respecting not butchering and the top must not be over plucked and over thinned . Feed it well, expose it to winter weather and you get plenty of back buds too. This tree is at one of those perfect stages I love - A mature tree - 50-60 years old & ready for a refined styling - and luckily the nursery owner Robert has asked me to style the tree for him, as even though it is for sale it has entered the 'personal collection' status. - I'm sure Peter can nod in agreement about trees entering the personal collection status ;-)


It is a decievingly large tree too - just over a meter tall atm, plenty of shoots and multiple buds. This tree will be styled 'tall and elegant' with really neat domed pads

Tree two is an old large parviflora,


The hollow is large and has not been cared for unfortunately - i can just about get my hand in it and the soft inner wood has a spongy compost like texture that needs removing back to hard wood and treating. The bark in interesting - the exposed areas match perfectly in colour and texture - the sheltered 'back' matches in colour but has not weathered and cracked so much.

This was the last owners prefered front - the trunk has smooth taper but the amazing movement in that kink is lost, so is the natural hollow - so I see a new front being chosen to show off the best features - the branches will be moved to suit.


A subtle turn shows the hollow more and adds more movement to the lower trunk - apex comes towards us too, but a few more angles will be explored. This tree should be coming home with me to be the white pine on my benches, but I have to style the Pentaphylla first, and several other trees that are at the nursery and ready to work on.


the trunk is as thick as my leg !, this one needs a few years to bring the foliage back but it will be a lovely tree again
 
I'll do a post on the rest of the nursery soon, but here is a rather good Kashima that lurks round the corner - looking pretty nice for October


Saturday 29 September 2012

Bit chilly out

When I look at artificially created deadwood 99% of the time it looks very poor compared to naturally aged sections of the tree. I dont mean the initial carving to add a basic shape to the wood but the finishing as this stage needs to show the effect of weathering where the manual methods used seem to remove it. Even sandblasting goes against convincing aging as the method removes the surface layer that has the cracks forming, although blasting is a good initial stage to make definition between the hard and soft wood.

Nature makes a maze of cracks, splits and grooves that vary in width and depth while following the grain perfectly, while power tools often make uniform grooves that follow the hand of the operator ! A scalpel is good for making a few slices in the wood surface but if overused looks just as false and uniform as power tools. Over the years I've noticed how the weather conditions directly effect the appearance of the deadwood - in wet weather the wood is swollen, the large cracks are smaller and the fine cracks have often disappeareed completely and when the wood dries in the sun it shrinks back, opening the cracks up again.

After a good cold winter I've noticed how much better the wood has aged and I think this comes from wet wood freezing so the ice opens the existing cracks up and also makes new ones. With this in mind I have been developing a brand new tecnique to put the deadwood through as many freezing winter days as possible, in a much shorter time scale.


This little can directs an icy blast of -50 degrees onto the deadwood - freezing it absolutely solid in moments.

(If you are working with new wood add a few score lines with a scalpel, working with the grain.)
First off the wood needs to be saturated, so spray it well or better still start the work after a few days of rain. - Give the wood one more fine spray so the existing cracks are full of water, then shield or protect the foliage before directing the spray onto the area being worked on.

 After treating for a minute at most, working is short bursts, the jin is frozen solid and the cracks are visibly full of ice. I then spray the jin again to thaw it out and repeat the work four or five times over an afterrnoon working on the trees.


 After one final freezing of the working area I let the wood thaw naturally. You can speed the cracking up at this stage if you use a hair dryer to dry and quickly shrink the wood, or you can just let it dry in the sun.

These two pictures are genuinely taken one hour apart - top one before treating and lower one after 5 freeze treatments - This is probably more weathering than an entire Cornish winter on one September afternoon


Even the colour has improved - I think this visibly proves you can help nature and weathering along a bit

Friday 14 September 2012

A bonsai weekend to remember

We had a really good bonsai filled weekend down in furthest Cornwall a few days ago. Peter Warren had made the epic journey down to my place to take a couple of small group sessions on the Saturday and Sunday, and each day 3 friends and I were entertained and captivated by the best bonsai teacher we have had the pleasue of working with. This first trip was completely open regarding species, tree stages and what the owner was hoping for - so we had Scotts Pine, Black pine, san hose junipers, white pine, hawthorn, juniper sergentii ..........and that was just day one !

We spent the morning session looking at each tree, discussing options and absorbing a medium sized books worth of information, while steadily Peter was pruning a bit here and there, preping trees for the next styling stage. After a quick lunch out came wire, tools, turntables and a hive of activity gave the material trees initial shape or the required tweaks and pointers for their next stage. All the time a wealth of information flowed, and through clever questions everyone was thinking too. All too soon evening arrived, trees were loaded up and the BBQ fired up, bonsai and non bonsai chat flowed until ???o'clock before the next morning came all too soon.

Famous tree - The late  Ruth Stafford Jones's black pine - japanese import from the late 1950's


Second day came with junipers, cryptomeria, Scotts pine, Black pine and satsuki., plus local made pots, display tables and another wealth of great help and advice. Trying to make bonsai from just books and the internet will give very 2 dimensional results, but to make really good bonsai needs far more - Being reminded how to look properly again, and how to make a tree that you like more than making a tree you think just looks good to others were good lessons learnt on day 2.

I think this is the type of 'workshop' I've wanted for years - the large group of people styling a pre bonsai and going home with a tree none the wiser isn't really that helpfull - not that I've been to one of those! These days we want accurate and up to date information - not rehashed old folk law from 30 year out of date books, and Peter certainly delivered a wealth of hints and tips relevant to the trees and people present.


Day two came to an end with everyone happy, heads full of info and buzzing with the bonsai bug. Trees were loaded up and the BBQ was fired up again to do a whole smoked chicken, and while we waited one of my junipers was changed from a tree done for last week to a tree set up for tomorrow. Peter saw the conflicting bits and complicated bits that were going against the trees better features so  branch angles were changed, the foliage re-arranged into softer open pads and bits that were not needed were pruned out. Soon it was dark so we got some light shining through the windows to see what was  going on, and then the smell of bbq chicken wafted across the garden and it was time to finish.
 
Personally I think Mr Warren is an asset to this country and his quiet modern style was a breath of fresh air in the current bonsai world - The biggest thing I learnt ?.........When a tree is not at the final stage you need to style it so it reaches that level of refinement and can be maintained easily - there is no point making hard fiddly work for the future, or making a tree that will be a struggle to maintain. And make sure a proper tree has a proper pot  - haha, and do the right jobs at the right time, and dont fiddle about for the sake of it................but luckily i am happy to sit back with a beer and watch the buds grow rather than pinch them off .......... 
 
We all gained a lot from the days, and I'm pleased to say it will be the first of many.
 
March 25th, 26th and 27th 2013 (that last one is news to you Peter haha)
 
We have a dedicated conifer repotting session starting with my Cuspidata on Monday then a group day with a max of 5 people for the Tuesday, primarily looking at juniper and pine root pruning, root placement, soil mixes, tree position in the pot etc. Wednesday is a surprise atm.
**3 places already booked for the Tuesday**
 
Special thanks go to:
Peter Warren
Satomi & Mandy
Frank, Phil, Roy, Owen, Colin & Gordon
Peter Norris Pasties
Stella Artois
French Chardonnay
Californian Zinfandell
Tesco Food counters
Illy coffee
Yorkshire Tea
Willowbog Bonsai Copper Wire
eco deck Uk
weber BBQ's
............................................


Sunday 2 September 2012

Taxus Cuspidata - a winter project

In the later years I have tried to concentrate on a small collection of nicer trees of varied species rather than too many of one kind. This also spreads the workload and seasonal interest to the collection.

One gap in my trees was a really good big yew, added to which I had never owned a japanese variety cuspidata so my radar has been tuned to keep an eye out for one in my travels. My choice when buying material is to try and get a mature tree that still needs the refining, fine wiring and a reasonable amount of styling rather than a more finished tree. Also I don't really go for very new material that needs 10-12 years to grow branches on, so I guess I look to shop in quite a narrow band classed as nice material trees, and even more so if there is a chance to make a transformation. This type of shopping does get you lots more for your money as you are noy paying for hours of proffessional wiring, or a final pot which can easily add 10-20% to the cost of a tree

I knew of this one for a while having seen pictures of it for sale in the past. It came from Shinji Suzuki I believe - it has had 3 UK owners but unbelievably the tree remained as unstyled but preped material - some of the deadwood had a bit of nice carving but most is just aged naturally. The live veins are natural and well swollen while the foliage mass has been kept pruned to maintain plenty of dense inner growth.

We nipped off in the van Friday as the tree had been reserved for a few weeks so needed picking up


Here she is - plenty to work with ! and the tree was surprisingly big too ! .......... mostly untouched trunk with quite a bit of soft dead wood to clear out - particular attention will be placed on making sure water can drain out of all the trunk hollows and into the pot - otherwise the rot will be impossible to control. This type of water rot hollowing in Japanese trees may be an intentional method as I have a couple of trees  that would be impossible to hollow in the intricate places where long spiralling holes go down the center with no machine 'access' holes.

 
I want the tree to be a classic twin trunk - the smaller section with its own tree like image to complement the larger trunk. There is a critical big bend to make this image though as the small trunk angle is flat, completely horizontal when I need it vertical for the tree I want to make. This is just like the juniper rigida from earlier in the year - but this branch was twice as thick !  The distance the branch needs to move is quite a lot so 2 torniquet wire strainers were connected together and secured to tree and pot with  3mm copper wire - doubled up.
 
 
The winding started and soon there were lots of little cracks and creaks as the flat branch was cranked up to become a trunk. I have not used raffia on this one as there is no twisting involved, just raising. The raffia does a great job of keeping the cambium layer from seperating from the under wood if you need to twist a branch, but yew is a flexible wood used for longbows so I decided to just keep the process neat and simple.
 
At 45 degrees the live vein feeding the entire trunk started splitting away from the dead wood - this was perfect as the bending got a lot easier so one single 10 minute stint saw the trunk bent 90 degrees upright. All the cracks were covered in sealer and the tree will be left untouched for a week or two while it accepts the new position.


 A new better viewing angle and the 2nd trunk is up - compared to the first picture there is now far more usable foliage on the right. This foliage could have been just wired up maybe but up close the appearance would be poor as viewers would see the 'trunk' bending away and the branches poking up. Now the job is done properly 
 
More to follow soon, but now the tree can have a little R&R